Contents
Reviving Sf9 cells stored in liquid nitrogen
- Rapidly thaw frozen cryovial of cells in 28°C waterbath with
shaking.
- Spray cryovial with 70% ethanol, wipe dry and transfer to
hood.
- Cut cryoflex with scalpel, and unscrew top.
- Use a sterile pasteur pipette to transfer contents of vial
to 9 ml "ready to use" medium.
- Spin down cells at 1,000x g for 5 mins.
- Discard supernatant.
- Resuspend cell pellet in 20 mls "ready
to use" medium and transfer to 125 ml flask.
- Incubate cells at 28°C with shaking at 150 rpm for 48 hours.
- After 48 hours, count cells and subculture.
Routine subculture
- Grow cells to mid log 1 - 2 x 10⁶ cells/ml.
- Split cells, by diluting with "ready
to use" medium to 2 x 10⁵ cells/ml (ensure lids
are loose!).
- Sf9 cells can be grown routinely in medium occupying up to
1/4 of the vessel volume, e.g. 500ml per 2L roller bottle.
- Continue incubation at 28°C with shaking at 150 rpm.
- Spin down cells once a fortnight and resuspend in fresh "ready
to use" medium.
|
|
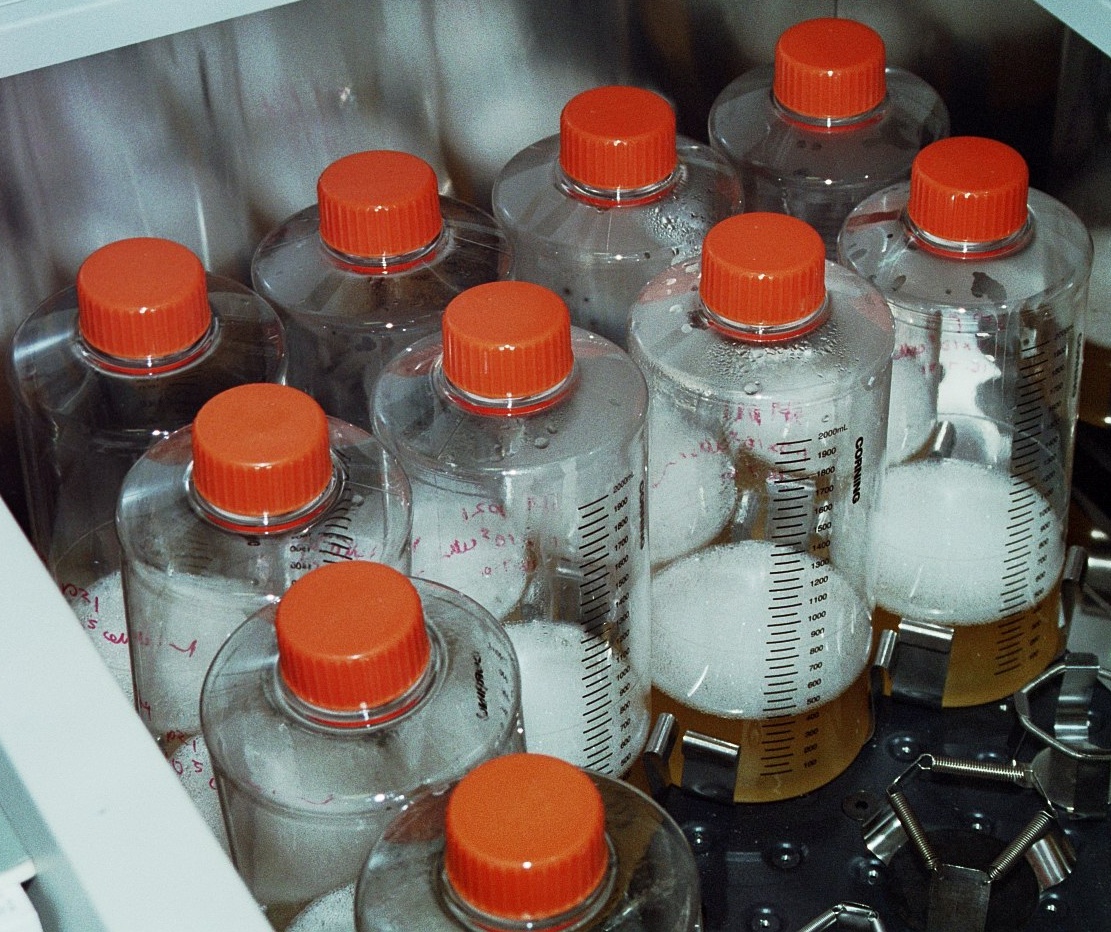
| Routine growth of Sf9 cells in suspension culture |
Freezing Sf9 cells for storage in liquid
nitrogen
- Prepare cryopreservation medium as follows: 7.5% DMSO,
46.25% "ready to use" SFM, 46.25%
conditioned SFM (medium used for growing Sf9 cells for 2-3
days, sterile filtered) as appropriate and store on ice.
- Harvest cells in mid log growth phase by centrifuging
at 1000x g for 5 mins.
- Discard supernatant and store pellet on ice.
- Resuspend cells in cold cryopreservation medium to a final
density of 2 x 10⁷ cells/ml.
- Aliquot 1ml volumes of cells into 1 ml internal thread cryovials.
- Seal cryovials with cryoflex as follows:
- Place cryovial in cryoflex, with the cryoflex cut to allow
a 1 cm overlap at each end of the cryovial.
- Briefly rotate the cryovial in a Gaz flame to shrink the
cryovial.
- Use fine forceps to pinch together and seal the cryoflex
as close to the ends of the cryovial as possible.
- Place cryovial on ice.
- When all cryovials are sealed, use a pair of scissors
to trim the cryoflex as close to the top and bottom of the
cryovial, without breaking the seal.
- Place cryovials in Scotlab polystyrene box at -20°C
for 1 hour.
- Place box at -80°C overnight.
- Place cryovials in liquid nitrogen store.
Counting Sf9 cells using an improved Neubauer
haemocytometer
- Combine and mix the following: 0.5ml 0.4% trypan blue
+ 0.3 ml 1x PBS + 0.2 ml Sf9 cells.
- Dampen the haemocytometer, either side of the trough,
and press coverslip firmly into place. Check for Newton's
rings.
- Mix the cell suspension again and then carefully transfer
a few µls by placing the
end of a filled micropipette tip onto the surface of the
haemocytometer adjacent to cover slip. The cell suspension
will flow under the cover slip by surface tension.
- Repeat for second haemocytometer chamber.
- Number of cells/ml = Average number of cells / Large Square
x 104 x 5
Transfection of Sf9 cells with recombinant
bacmid DNA
- Seed 9 x 10⁵ cells per 35 mm well (of a 6 well
plate) in 2 ml of SF900II SFM containing penicillin/streptomycin
at 0.5 x final concentration (30µg/ml
sodium benzylpenicillin, 50µg/ml
streptomycin sulphate).
- Allow cells to attach at 28°C for at least 1 hour.
- Prepare the following solutions.
- For each transfection, dilute 5 µl of mini-prep
DNA into 100 µl SF900II SFM without antibiotics.
- For each transfection, dilute 6 µl Cellfectin
reagent into 100 µl SF900II without antibiotics.
Note: Cellfectin reagent is a lipid suspension that
may settle with time.
- Mix thoroughly by inverting the tube 5 - 10 times before
removing a sample for transfection to ensure that a homogeneous
sample is taken.
- Combine the two solutions, mix gently, and incubate for
15 to 45 mins at room temperature.
- Wash the cells once with 2 ml of SF900II SFM without antibiotics.
- For each transfection, add 0.8 ml of SF900II SFM to each
tube containing the lipid-DNA complexes. Mix gently. Aspirate
wash media from cells and overlay the diluted lipid-DNA
complexes onto the cells.
- Incubate cells for 5 hours in a 28°C incubator.
- Remove the tranfection mixtures and add 2 ml of SF900II
SFM containing antibiotics. Incubate cells in a 28°C
incubator for 72 hours.
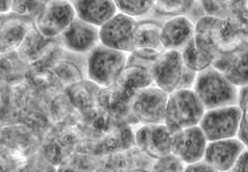
- Infected and uninfected Sf9 cells can be distinguished
by morphology (see figures below).
| |
|
| Uninfected Sf9 cells.
These cells continue to divide and form a confluent
monolayer. |
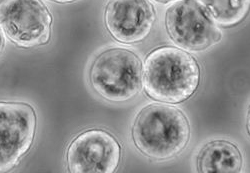
Sf9 cells infected with recombinant
baculovirus. These cells stop dividing and enlarge. |
- Harvest virus from cell culture medium at 72 hours post-transfection.
Harvest/storage of recombinant baculovirus
- When harvesting virus from the transfection, transfer the
supernatant (2 ml) to a sterile, capped tube. Clarify by centrifugation
for 5 min at 1000 x g and transfer the virus-containing supernatant
to a fresh tube.
- From the initial tranfection, viral titers of 2 x 10⁷
to 4 x 10⁷ pfu/ml can be expected.
- Store the virus at 4°C, protected from light. For long
term storage of virus, the addition of fetal bovine serum (FBS)
to a final concentration of at least 2% FBS is recommended.
Storage of an aliquot of the viral stock at -70°C is also
recommended. Stability studies have shown that, with two specific
exceptions, the viability declines very little over the period
of a year's storage at 4°C (see first figure below). Two
specific viruses (BRAF35 and hXTH2) were very unstable at 4°C,
with over 1000 fold loss of titer in 3 months(see second figure
below). These viruses appeared stable when stored at -70°C.
A single freeze/thaw cycle does not decrease viability (see
third figure below).
- Determine the viral titer before amplifying the virus stock
or analyzing protein expression.

Click pictures for larger versions
|
Baculovirus stability during
prolonged cold storage: Recombinant baculoviruses
were stored in the dark at 4°C, and samples taken
at various intervals for analysis by plaque assay. |
Click picture for larger version
|
Baculovirus stability to a freeze/thaw
cycle: Recombinant baculoviruses were subjected
to a single freeze/thaw cycle. Samples were taken before
and after the freeze/thaw and analysed using the plaque
assay. |
Amplification
Only use Sf9 cells grown in SF900II for amplification. Infect
a suspension or monolayer culture at a Multiplicity of Infection
(M.O.I.) of 0.01 to 0.1. Use the following formula: Inoculum
required (ml) = desired MOI x total number of cells / titer
of viral inoculum (pfu/ml)
Transfections generally yield > 1 x 10⁷ pfu/ml,
allowing use of just part of the P1 stock to be amplified
with suspension cells at 2 x 10⁶ cells/ml. The
Quick Amplification Guide suggests the best way to amplify,
should the baculovirus yield be lower than average.
Quick Amplification Guide
| Titer of the PI stock (pfu/ml) |
Amplification |
| 1x10⁶ to 1x10⁷ |
Add 2ml PI stock to 100ml Sf9 cells at 2x10⁶
cells/ml, incubate as 2x50ml infected cells in 2x1L
Erlenmeyer flasks |
| 5 to 9x10⁵ |
Add 2ml PI stock to 50ml Sf9 cells at 2x10⁶
cells/ml in a 1L Erlenmeyer flask. |
| 1 to 5x10⁵ |
Add 2ml PI stock to 10ml Sf9 cells at 2x10⁶
cells/ml in a 125ml Erlenmeyer flask. |
| 3 to 9x10⁴
|
Add 2ml PI stock to 5x10⁶ Sf9 cells on
a 10cm plate. |
| 2x10⁴ |
Add 2ml PI stock to 3x10⁶ Sf9 cells on
a 6cm plate. |
| 1x10⁴ or less |
Remove medium from a 3.5cm plate seeded with 1x10⁶
Sf9 cells and replace with neat virus. |
- Efficient viral amplification requires extra aeration. Do
not exceed 1/20th vessel volume and use Erlenmeyer flasks rather
than roller bottles.
- Continue incubation at 28°C, 150 rpm for 72 hours. The
titer reaches a maximum at 72 hours and then declines (see figure
below).

Click picture for larger version
|
Baculovirus amplification: Sf9
cells growing in suspension SF900II culture at a density
of 1.7 x 10⁶ cells/ml were infected with a
recombinant baculovirus ( M.O.I. of 0.1). Samples were
taken over a period of 4 days, and analysed for virus
using the plaque assay. |
Plaque assays
The plaque assay can be used to plaque purify virus or to
determine viral titer in plaque-forming units per ml (pfu/ml)
so that known amounts of virus can be used to infect cells
during subsequent experimental work. In this assay, cell monolayers
are infected with a low ratio of virus, such that only isolated
cells become infected. An overlay of agarose keeps the cells
stable and limits the spread of virus. When each infected
cell produces virus and eventually lyses, only the immediate
neighboring cells become infected. Areas of clearing are produced,
called plaques. Each plaque represents a single virus. Therefore,
clonal virus populations may be purified by isolating individual
plaques.
Day 1
- Add agarose (A-4018; Sigma Type VII: low gellingtemperature)
to water to give a final suspension equivalent to 3%, and
sterilize by autoclaving.
- Melt 3% agarose in microwave, and place in water bath
at 45°C.
- Count Sf9 cells, and dilute the culture to 5 x 10⁵
cells/ml in "ready to use" medium.
- Seed 35 mm petri dishes with 2 ml of culture (1 x 10⁶
cells).
- Incubate the dishes for 2 hours at room temperature.
- Set up virus dilutions using 20 µl virus in 180 µl "ready
to use" medium; use dilutions down to 10-7.
- Remove medium from dishes and replace with 100 µl virus
dilution.
- Incubate at room temperature outside the hood for 1 hour.
Agitate gently every 15 mins.
- Remove viral inoculum from 6 dishes.
- Combine 8 mls "ready to use"
medium with 4 mls 3% agarose (and 120 µl X-gal 25 mg/ml
in DMF, if colour selection required).
- Pipette 2 mls of 1% agarose in medium onto each dish.
- When the agarose is set, overlay with 1ml "ready
to use" medium.
- Disinfect sandwich box with 70% ethanol, and line with
tissue dampened with sterile water.
- Incubate in the humidified sandwich box at 28°C for
3 - 4 days.
Day 4
- Dilute 1 part 0.4% neutral red with 19 parts 1x PBS.
- Stain plaques by adding 1 ml neutral red/PBS solution to each
dish. Incubate at 28°C in the dark for 2 hours.
- Aspirate liquid and invert dishes overnight (leave at room
temperature in the dark).
Day 5
- Count plaques!
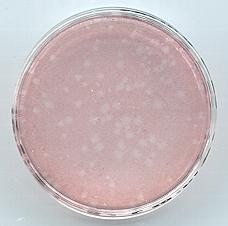 |
Baculovirus
plaques. Zones of clearing (plaques) are generated
by infection of Sf9 cells with individual baculovirus
particles. Uninfected Sf9 cells surrounding the plaque
are stained pink with neutral red. |
Infecting Sf9 cells for production of recombinant
protein
- Grow Sf9 cells to a density of approximately 2 x 10⁶
cells/ml (500ml culture/2l roller bottle, for large scale
expression).
- Infect cells with an M.O.I of 2.
- Incubate infected cells at 28°C with shaking at 150rpm
for 1-4 days (generally 3 days).
- Take samples for analyzing recombinant protein expression
(see next section).
- Harvest cells by centrifugation for 5 mins at 1000x g.
- Discard supernatant and store pellet at -80°C.
Analyzing recombinant protein expression
by cells grown in shake flasks
"Whole cell"
Take 3.3 x 10⁵ pelleted Sf9 cells
and lyse with 50 µl 1x SDS-GLB. Boil samples for 3 mins and
load 10 µl onto an SDS polyacrylamide gel.
Soluble vs insoluble
Take 3.3 x 10⁶ pelleted cells and
resuspend in 0.5 ml lysis buffer. Spin. Remove supernatant
and mix with an equal volume of 2 x SDS GLB (=soluble fraction).
Add 1 ml of 1 x SDS GLB to pellet (=insoluble fraction). Boil
samples for 3 mins and load 20 µl onto an SDS polyacrylamide
gel.
Preparation of extract
- Add purification compatible buffer to pellet, using 5 ml buffer
per gram of cells.
- Homogenize (10 strokes).
- Remove cell debris by centrifugation at 10,000 x g for 10
mins.
- Transfer the supernatant to a new tube and proceed with purification.